Creating a blog online is relatively easy.
The fastest way is set a blog up in WordPress or Blogger. I use WordPress as I find it easy to use. I can choose my own themes, layouts and there are plenty of free plug-ins that add functionality to my blog. I have created the blog and website myself and I continue to manage myself. I pay for my domain name only. Everything else is free!
This blog post will look at setting up a counselling blog in WordPress.
So where to begin?
To start a blog in WordPress you need to go to WordPress.com and click on the right hand corner button ‘Get Started’. You will need to have an email address.
The following are 6 easy steps you need to take:
-
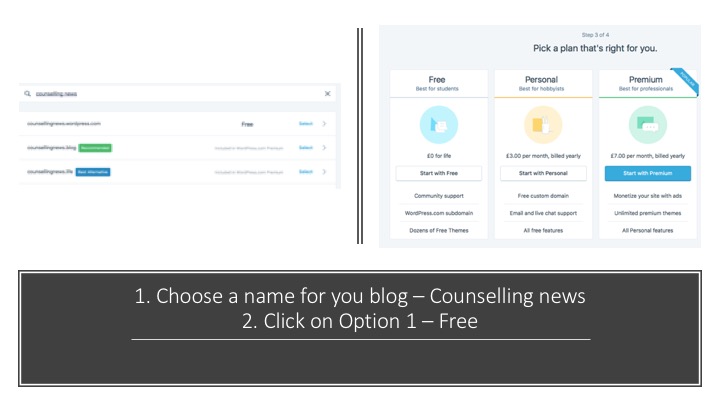
Choose a name for your blog.
As you can see below, I created a blog called ‘Counselling News’. You may have to be creative here. Many names that are easy to think off, say counselling blog, will have been taken already.
2. Choose a blogging plan.
The easiest and cheapest way is to select free plan. We will talk about the paid plans later on. As you can see I have selected a name counselling news. This has given me an online address www.counsellingnews.wordpress.com.
-
Select a user name and password.
Don’t forget to make a note of these. You will need to use these every time you log onto your blog. It is best to think of an user name that is not the same as your blog name. I would also recommend you select a password that has letter, numbers and capitals in it. You do not want anyone hacking into your blog.

-
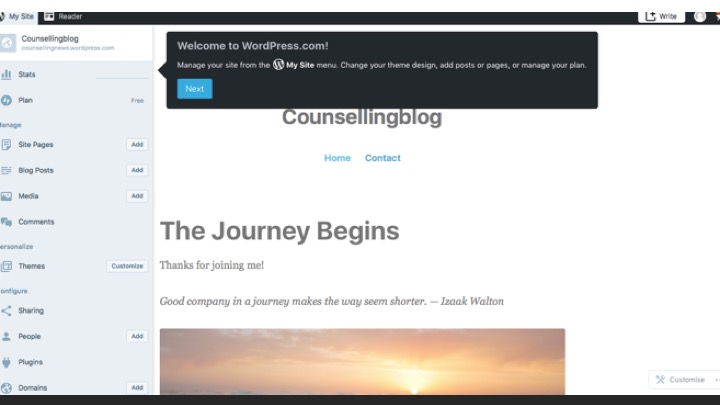
Confirm your registration through email.
WordPress will send you an email. Click the link in the email, and this will confirm your registration. This will take you straight to your blog. It is now set up. Your blog is set up and online. It now needs content. You need to create your first blog post.
-
Add a new post.
Click on the link add post. This will take you to a blog page where you can write and edit your page. Don’t forget to give your blog post a title. You then write below this. I would recommend that you write your post in a Word document first. You can then copy and paste your blog post into your blog. This will ensure that there are no spelling mistakes.
6. Publish your post when you have finished.
Once you have published your page, it will go live. You can view your post. If you want to edit your post at a later date you can. If you do not want to publish the post yet, you can save the post as draft.
You are done. You can now write your next post!
To have a look at a basic WordPress blog, look at Erin’s website. Erin is a training counsellor in her final year. She is blogging about her reflections. Her blog shows you how easy it is to have a WordPress Blog. Erin has paid extra for the domain address.
And finally….
As you can see from my blog, I have created a website around my blog. I registered my website address inyourcommunty.org.uk with a hosting company. I pay a monthly fee for this. All the website is created through the platform WordPress. At the moment I continue to use a free theme and free plugins.
There is a lot of helpful websites that give you good information on how to create pages for a website. You can also find useful tips on different plug-ins. Whatever you want to do, just google it and you will find lots of different resources.
Good examples of Counselling blogs
Blog using WordPress
To have a look at a WordPress blog, look at Erin’s website. Erin is a training counsellor in her final year. She is blogging about her reflections. Her blog shows you how easy it is to have a WordPress Blog.
Blog using Blogger
If you want to look at a counsellor who has created her website using the platform blogger, have a look at Amanda’s. It is always useful to look at different blogs to give you inspiration and to see what you like.
For a list of more blogs created by counsellors, have a look here.